Cinematic Video Editing Tutorial on Mobile Using CPK App
So guys, I can say with a guarantee that after watching this tutorial, you will also learn how to do cinematic video editing. You can take any normal video shot on your phone or camera and convert it into a professional cinematic video. From trending effects to A-to-Z editing, I have shown everything in this guide using the CPK application.
Step 1: Install the CPK Application
First, you need to install the CPK app. If you don’t have it yet, visit my channel where I have shared multiple tutorials about CapCut and related apps. After installing, open the app and click on New Project. Select all the video clips you want to edit one by one.
Step 2: Add Audio or Trending Reels Music
To make your video more engaging, add trending audio. You can use MP3 songs from your phone or even extract audio from popular reels. This helps you sync beat marks with your video for smooth transitions. In CPK, you’ll find an Audio option next to the text tool where you can import sounds.
If you want royalty-free music, check Pixabay Free Music or Uppbeat.io.
Step 3: Beat Marking for Perfect Sync
Once your audio is added, mute the original clip sound and start beat marking. This will allow you to align effects and transitions with the beats of the song. The advantage of copying reel audio is that you can replicate their beat marks and sync effects more accurately.
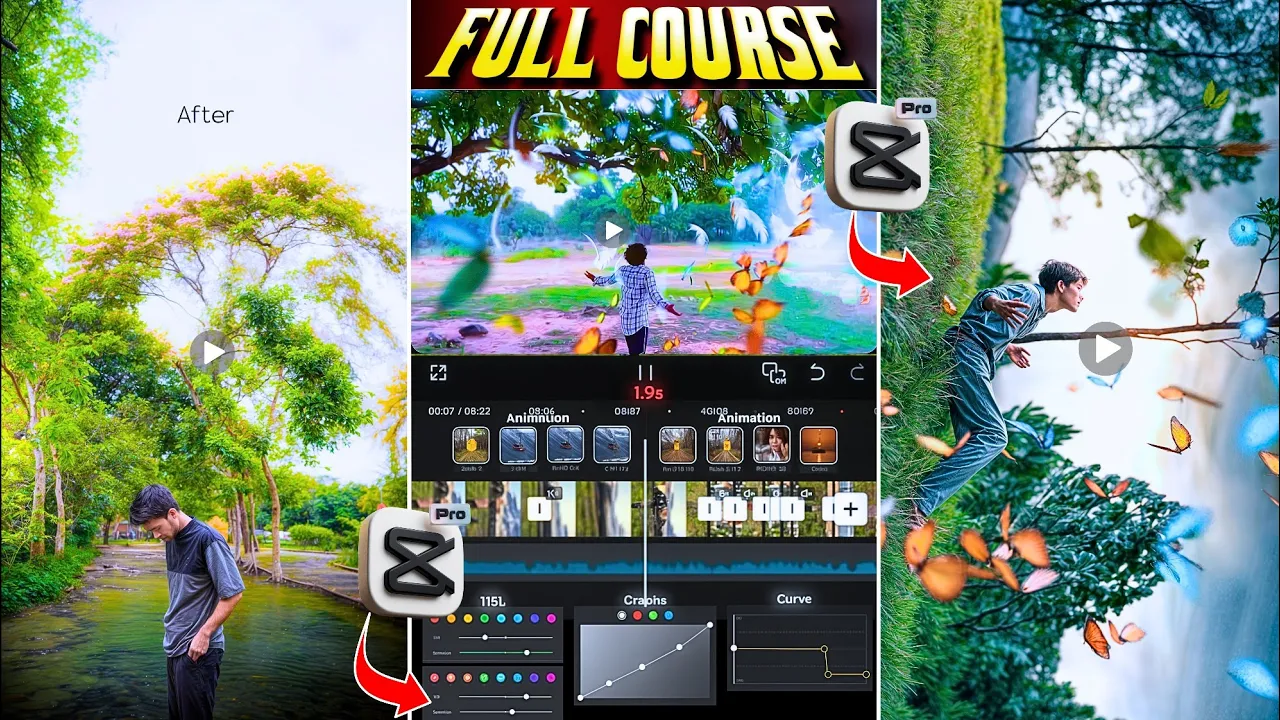
Step 4: Apply Slow Motion with Graph Editing
Select your video clip, click on Speed → Graph, and create a custom speed graph. This will help apply smooth slow motion effects. You can zoom into clips and add keyframes for creative movements.
Step 5: Add Keyframes and Creative Zooms
Insert keyframes at the start and end of your clips to add zoom-in or zoom-out effects. To make transitions smoother, use graph editing inside CPK. This makes your video look more dynamic and professional.
Step 6: Use Motion & Animation Effects
Now comes the cinematic touch! Apply motion effects from the animation section like Quick Open, Glass Effect, or trending in/out animations. Adjust the length of each effect for a natural look.
For additional effects, explore CapCut Official Website as it has a huge library of free animations.
Step 7: Add Transition Effects Between Clips
Click between two clips to add transition effects. Popular ones include Paper Effect or light transitions. Match transitions with the beat of your song for a professional cinematic vibe.
Step 8: Adjust Colors and Apply Filters
Next, adjust brightness, saturation, and contrast for better color grading. Use HSL controls to enhance skin tones and backgrounds. Finally, apply filters like MO Filter or Green Orange to create a cinematic color tone.
You can also try free color LUTs from IWLTBAP Free LUTs.
Step 9: Apply Golden Effect for Final Touch
The last step is applying the Golden Effect to give your video a glowing cinematic look. Adjust glow, tone, and brightness as per your style. Duplicate this effect across clips if needed.
Step 10: Export in Ultra HD
After completing all edits, export your video in AI Ultra HD mode for the best quality. Keep the bitrate full for sharp results, especially if you’re uploading on Instagram or YouTube.
Final Thoughts
And that’s it! Using just your phone and the CPK app, you can transform basic footage into a professional-looking cinematic video with smooth slow motion, trending effects, and perfect transitions. If you want to learn more advanced mobile editing, check out this guide on best video editing apps.